
How to use Masking Fluid for Watercolor Painting
Ever tried painting a big wash of color around a complex shape ?
There are many occasions when you want to preserve the white paper and conserve key features in a composition. This watercolor technique is usually referred to as “reserving whites”. Of course, you can paint around shapes with some intricate brushwork, but often I find that the best solution is to protect parts of the paper by masking them. There are a few different methods you can use for masking, but for complicated forms most artists use masking fluid(also known as liquid frisket).
So how do you use watercolor masking fluid?
Before you start, stir the masking fluid thoroughly. Don’t shake the bottle or you will get bubbles in the mixture. Use a masking fluid applicator to paint the shapes you want to mask. Various techniques can be used. Only apply masking fluid to dry paper, and make sure the fluid is dry before you apply a wash of watercolor. Once the fluid is completely dry washes can be applied quickly and freely. Clean any brushes or applicators immediately after use. When you’ve finished painting, wait for the paint to dry entirely before removing the masking fluid.
The are a lot of great techniques that can be used to apply masking fluid, and you can produce some really impressive effects. I use a variety of tools with this method and I’ll go over them in detail below. I’ll also explain all the tips and tricks that I’ve learned about using watercolor masking!
What is Watercolor Masking Fluid?
Masking fluid creates a protective barrier on your watercolor paper to prevent the paper from being colored by paint. The main ingredient in masking fluid is liquid latex. Most products you can find are tinted with coloring to provide a better contrast on white paper, making it easier to see where you are painting the mask.
This liquid is applied to paper using various application techniques where it dries to form a watertight coating.
The conventional way to achieve white with watercolor is to use the white of the paper, and not by painting with white paint as you do with other media such as oil or acrylics. Some artists do use white gouache for example, but to get the purest whites and highest contrast you need to preserve the white of the paper.
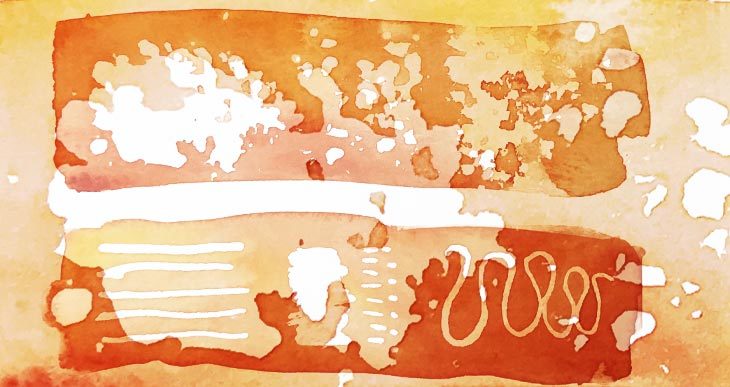
When you want a large number of complicated white shapes with a darker background the easiest way to accomplish this is by masking your paper.
This is where masking fluid comes in very handy. It can be used to shield any white or light toned shapes beforehand. You can then paint a continuous background wash as if the white shapes were not there, making brush strokes free and easy.

The advantage of masking fluid is that you can preserve numerous complicated shapes without having to paint around them. You can use any other watercolor techniques in conjunction with masking. The downside is that masking fluid produces hard edged shapes, so if you want soft blended edges to any white shapes this may not be the best solution.
Watercolor masking fluid is especially good for negative painting techniques where you establish a subject by painting around it rather than painting just the subject itself.
How to use Watercolor Masking Fluid
The first step is to plan your artwork. Most of the time I begin a new painting with a pencil sketch. I then think about any zones which need to remain white and whether masking fluid is the appropriate way to conserve them. I can then use my pencil outline as a guide for locating highlights and applying the frisket (Try to think of it as painting the whites rather than masking shapes).
There are a few important tips to keep in mind before using masking fluid on your watercolor project.
Masking Fluid Tips
- Don’t use the masking fluid on damp paper. There’s a risk that the masking fluid will seep into the paper and you can damage the paper when you remove it.
- Don’t leave the masking fluid on the surface of your paper for a long period before removal. Over time it becomes harder to remove, and because masks usually contain a pigment to color them, you run the risk of staining the white paper, which kind of defeats the purpose ! I tend to remove the masking three or four hours after the painting is finished. If you leave the masking a day or two, removal becomes more tricky !
- Similarly you should be sure that your watercolor paint is thoroughly dry before attempting to remove the mask. If you paint is still moist during removal then it’s easy to smear the paint and contaminate the white paper.
- Keep in mind that you can also use masking fluid on a previously painted area. If you have some light toned shapes you want to preserve then you can mask them with fluid. However this will almost always lift off a small amount of paint when you remove the masking fluid. The amount of lifting off generally depends on the staining properties of your watercolors. I don’t advise using student grade watercolors for this kind of thing because they seem to lift off too easily.
- Don’t try to speed up the drying process for masking fluid. Because it’s composed mostly of latex rubber, any heat can cook the rubber and make it very difficult to lift off the paper afterwards. So don’t use a hair dryer and no direct sunlight.
- Good quality watercolor paper seems to work better in conjunction with masking fluid. This is probably because watercolor paper has a coating of protective sizing which prevents too much moisture from being absorbed by the paper. If you use soft velvety paper you will probably rip it when the masking fluid is removed.
- Almost all masking fluids containammonia so they smell quite strongly, and if you’re sensitive to this kind of thing then try to use it in a ventilated space (if you’re susceptible to odors the only product I know of without ammonia is made by Schmincke). Personally I’ve never found the smell overwhelming.
How to Thin Watercolor Masking Fluid
Masking liquid is soluble with water. This is useful to know because it dries quickly and can become lumpy over time. If your masking liquid is too thick to flow properly you can thin it with a couple of drops of water. I find the thinner consistency really helps for masking fine details.
To prevent the contents of the bottle from drying I usually pour a small amount of masking fluid into a ceramic dish and cap the bottle immediately.
How to Remove Masking Fluid
There are a few good methods for removing dried liquid mask and I’ll go over them in more detail here. Masking fluid can be removed as soon as your painting is sufficiently dry. Don’t attempt to remove it when your artwork is still damp or you could spoil the painting with smudges. Don’t forget to remove the masking quickly after your artwork is finished or it will become more and more difficult to remove as time goes on.
How do you Remove Masking Fluid from Paper?
To make sure your painting is completely dry, touch the painting gently with the back of your fingers, and if the paper feels cool then it probably needs more drying time.
Dried masking usually peels off quite easily, but whichever method you choose for removing the mask, do this slowly and gently so you don’t damage the paper.
You can of course use your fingers, but I would keep this to a minimum. You run the risk of leaving traces of oil from your fingertips which can stain the paper and effect the way watercolors are absorbed by the paper when you come back to paint.
The best method I have found for removing masking fluid is with a kneadable eraser(also called a putty rubber). These things are great because you can mold them to the shape you want for more precise erasing and they don’t leave any residue on the paper. Rub the edges of the dried masking with the eraser to start lifting off the mask then peel off with your fingers.

To finish off you can try using low tack masking tape wrapped around your finger which you can dab on the surface to pick off any remaining mask.
You can also get a specialized remover known as a rubber cement pickup. This is also a reliable way to remove dried masking and is used just like an eraser.
How do you Remove Masking Fluid from a Brush?
Brushes can simply be cleaned using water because masking fluid mixes with water. Be sure to clean your brush immediately after use, otherwise you have to pick the dried latex off the brush.
A bit of advice – don’t use your best brushes for applying masking liquid. This stuff can ruin them. The best brushes I’ve found for this purpose are synthetic brushes. They have the advantage of keeping a nice pointed head and they clean up more easily than other types of hair (some artists recommend using old brushes, but if they can’t form a good point then they’re no good for precision work).
As mentioned previously, to make cleaning easier, I recommend you dip the brush head in washing up liquid or rub it on a bar of soap to protect the brush hairs before dipping in your masking fluid every few brush strokes.
If you do find yourself with a gummed up brush that you have difficulty cleaning, I’ve heard that some artists use lighter fluid to help soften the latex for cleaning.
Watercolor Masking Fluid Techniques
Masking fluid techniques mostly depend on the type of tool you use to apply the liquid mask to paper. You’re only limited by your imagination !

To work with masking fluid I use the following setup:
- Masking fluid.
- A small ceramic dish into which you pour some masking fluid.
- A small bowl with some soapy water(this is if you’re using a brush to apply the masking).
- A masking fluid applicator, brush, or whatever you want to try.
- A kneadable eraser for removing the mask.
You can use just about anything you like to apply masking fluid to paper, and each tool will help to create different effects. Apart from brushes, I use things like a ruling pen, toothbrushes for splatter effects, sponges, bamboo quills, and “color shapers” which are silicone tools traditionally used for painting, blending and sculpting.
Masking Fluid with a Brush
The most obvious and direct technique for using masking fluid is with a brush. Masking fluid flows off a brush well and you can get a long flowing brush stroke. I have a set of synthetic brushes in different sizes by Frisk which I’m really happy with. They clean up fine so long as you do this quickly after use.

To use brushes I dip them first into soapy water which to a certain extent will protect the fibers of the brush. A good technique is to fill up a small container with water mixed with a small amount of washing up liquid. After every few applications of mask, dip the brush head in the soapy water again. This helps prevent the latex drying out on the brush which can become gummy after a while. When the brush gums up you also lose precision because the tip will no longer have a sharp point.

Masking Fluid with a Ruling Pen
A ruling pen is a drawing instrument which can be filled with fluid for drawing lines. Most of the time you dip the tip into some ink, but you can also use this tool with masking fluid.

The advantage with a ruling pen is that you can drag out precise thin lines so it’s an excellent way to mask grass, hair, whiskers, wires or anything that needs representing with fine lines.
Masking fluid Silicone Applicator
These things are usually called color shapers – not sure why, but they do make a handy instrument for laying down masking frisket. You can get a variety of shapes and sizes of heads. The silicone rubber head is quite elastic and pleasant to use and you can create a variety of marks including quite fine detail.

They need to be dipped often in the masking fluid. The advantage of these things is that cleaning is obviously simple because there are no fibres to get gummed up with dry frisket. But personally i prefer using a brush because the flow of the marks is easier.
Masking Fluid with a Bamboo Quill
These are the kind of things used for calligraphy and they’re pretty inexpensive. I find these work quite well and have a good level of precision. Really simple to use and easy to clean because you just pull the latex off when dry.

I have a set with a variety of nibs which lets me apply broad strokes or very small detail. So they’re good for drawing a variety of marks on the paper.
The only downside is that they don’t hold a lot of liquid so you have to repeatedly dip the nib in the masking fluid.
Masking Fluid with a Sponge
This is a fun way to apply masking fluid and creates some interesting texture effects. I use natural sponges since they have a good variety of surface texture. This is a great technique for creating beautiful sporadic patterns.

To use this method your sponge needs to be damp before dipping it in masking fluid.
Clean the sponge directly after use to remove the masking fluid. I keep a couple of sponges specifically for using frisket because over time you can get a build up of latex which is difficult to clean, but it doesn’t much effect their usability.
Masking with Toothbrush Splatters
You’re probably familiar with this technique for applying colored splatters to your paintings. But a toothbrush is just as effective for creating speckled white dots for adding texture to watercolor paintings. Again, you might want to keep a toothbrush specifically for use with masking fluid.

Masking Fluid Pen
This is any kind of bottle with a nozzle at the tip for squeezing out the frisket. It sounds like a good idea for applying the liquid with precision but I have not had great experience with this method. I much prefer having one of the above tools which I feel gives me much more control.
Above all these pens are an expensive way to buy masking fluid ! The “pens” are small – about half the size of a standard bottle for the same price ! So basically twice as expensive…
Watercolor Masking Fluid Alternatives
There are a few other ways to reserve the white paper or to create white with watercolor painting.
- White gouache is a handy way to paint in some highlights when needed, but even though this kind of paint is fairly opaque, it does not have the same brightness and contrast as preserving the white paper. It’s good for small specks of white but not very effective over large areas.
- Wax resist is a technique you may remember from your childhood ? Wax repels water so you can use it in a similar way to masking fluid to protect parts of the paper. You can find white wax crayons specifically for applying wax resist. This technique produces some interesting textures, but the downside is that it is not very good for precise details or sharp edges. Also, the wax normally remains in place on the paper, because removal is difficult.
- Lifting Off & Scraping are well known techniques for recovering highlights and small zones of white paper, or for creating marks of a lighter tone. Scraping is achieved with a razor or a similar sharp tool. It’s a good technique for making small linear marks of white by removing the surface layers of paint, but it does damage the surface of the paper, and is really only good for small areas. Lifting off involves brushing the paint with a damp brush (or a a damp clean cloth, sponge, tissue, etc.). This technique has its limits because it depends mostly on the staining properties of your watercolor paints
- Frisket film is a low tack transparent film mostly used by airbrush artists. I have found this tricky to use on watercolor paper because of the textured surface, but it is a handy solution for large areas that need masking. Just be sure to press the film down firmly to get a good seal. Masking tape is also a good solution to have to hand for masking larger surfaces and prevent you from wasting large amounts of frisket. Make sure it’s a low tack version of masking tape ! I use Frog tape which in my experience leaves crisp edges and doesn’t ruin the paper or paint when you remove it.
Best Watercolor Masking Fluid
My favorite masking fluid is a product by Pebeo known as “drawing gum”. This is a liquid latex frisket like many other brands but it has the advantage of being tinted with a blue color which I find makes it easier to apply precisely. On top of that it’s one of the few brands that come in a big 250 ml bottle which makes it great value. Also it doesn’t smell as bad as some of the other products I’ve tried !
Phew !
Liquid masking is only a small part of all the watercolor supplies you’ll need – click the link for an on-depth overview of other painting materials…


Really detailed yet to the point. Thank you very much Anthony.
Enjoy your watercolors Julien 🙂
Fantastic information! Thank you for sharing your amazing insight into watercolor products, techniques and your personal experience. I look forward to receiving your newsletter.
Thanks Lisa 🙂
Your posts and videos are very helpful, thank you!!! The best I’ve found on the internet.
Thanks Deeana 🙂
You have a gift for explaining things clearly. Tones and values – never as clearly understood until I read your blog. I’m sticking with you to train myself to paint.
Happy to help 🙂
Dear Anthony,
I just discovered your website and I’m very glad I did. I’m just getting started (haven’t even ordered my supplies yet, most of my selections are in my Dick Blick shopping cart). I was researching masking info and found your site. Very informative. I will add the Pebeo “drawing gum” to my cart.
I intend to read all of your information before ordering. Thank you
Ken Corns
Just found your website today. So happy I did!! So informative and very easy to follow. Thank you! I’m in process of creating a watercolor picture for my granddaughter’s highschool graduation at her request. I haven’t done my artwork for many years, so we’ll see how this comes out.
Thank you again for all your helpful info.
Kathy M.
Good luck with your adventure with watercolors Kathy !
I rarely leave comments, but reading your info inspired me to try some of the products you talk about! Wish you had Amazon links. It’s easy to set up, and this is just the type of content I’d like to support.
I don’t do watercolor, but am thinking this may work for pastel, and I’m gonna give it a try!
Thanks very much Linda – glad you enjoyed it…
Just what I was looking for. Thank you.
Thank you for this amazing explanation! Nicely explained with every pros and cones. By reading your post itl make the painting process easier and more comfortable. It helps a lot.
Glad it came in handy Vijaya
These are well-planned and executed lessons. Thank you!
Thanks Ruby! Glad to be of help…
Hey Teacher! You need to link you this page, I would click on it all. <3
New faithful student Ruth