
Watercolor Fall Leaves (How to paint Autumn Leaves the Easy Way)
I’d like to show you a simple and effective way to paint autumn watercolor leaves. Fall is just beginning where I live, and the first leaves are starting to drop. The following “watercolor fall leaf compositions” are really simple to paint. I think you’ll find the process surprisingly easy and that it produces some great results!
I’ll be showing you two different approaches to painting autumn leaves:
- The first will show you some simple techniques to paint a convincing, attractive, leaf composition. This is a two-dimensional composition that you can reproduce using your own leaves as inspiration, or just copy the sketch template I used.
- Then I’ll show you how to take things one step further and paint a more realistic looking leaf. Using the exact same methods applied in the first painting, I’ll demonstrate how to paint a more “three-dimensional” still life of a fall leaf.
Don’t be daunted by the idea of trying to paint a realistic still life, even if you’re a beginner. I honestly believe that watercolors can be enjoyed by anyone no matter what their level of experience. You don’t have to be a proficient artist to produce delightful paintings. I hope these examples will prove to you that by practicing your technique you can begin to master more complicated subjects.
Autumn Leaves Color Scheme
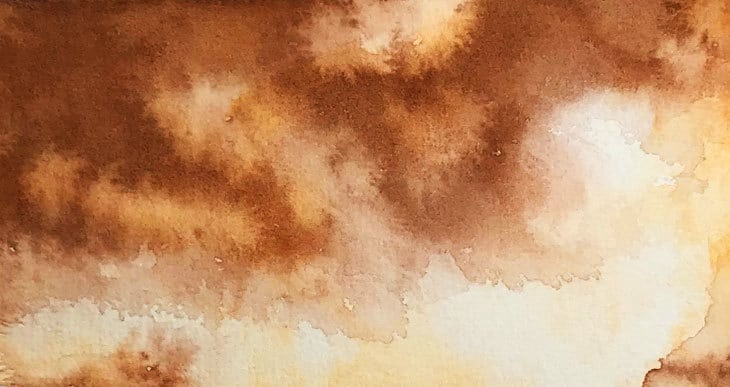
Fall marks the transition from summer to winter. The colors on the leaves are turning from green to yellow to red. Like many of us, I love this harmony of autumnal colors.
This kind of color scheme is known as an analogous color palette, and it’s difficult to go wrong when painting with these hues in watercolor – they just blend together so beautifully! Fall colors are predominantly warm (red and yellow) with a touch of cool hues (greens). The combination of both warm and cool hues tends to provide a sense of balance.

Analogous colors are those that are close together on the color wheel. These kinds of colors blend together smoothly and have a low amount of contrast. Analogous colors are said to be harmonious and calming.
Easy Fall Watercolor Leaves Step by Step
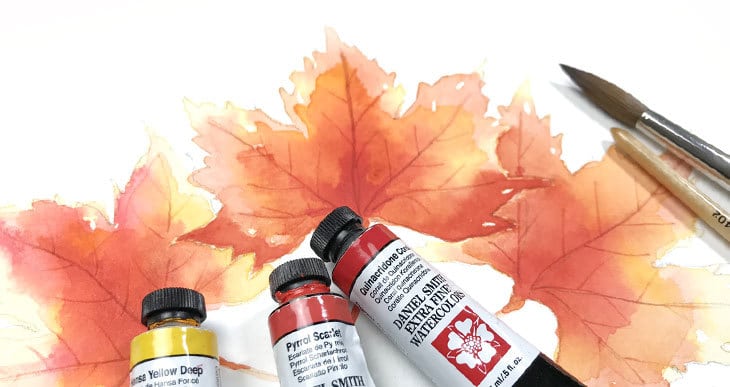
I’ve chosen a simple composition of three maple leaves for this first exercise.
Why three?
Well, the human eye finds odd numbers produce a more balanced composition, and three seems to be the optimal number. Odd numbers set up a more dynamic and visually interesting scene (just something to keep in mind next time you arrange a still life composition).
I’m using just three Daniel Smith colors for my fall color palette: Hansa Yellow Deep, Transparent Pyrrol Orange, and Quinacridone Coral. You’ll find some of my paint recommendations here…
This exercise brings together two fundamental techniques of watercolor painting. Wet on wet and glazing.

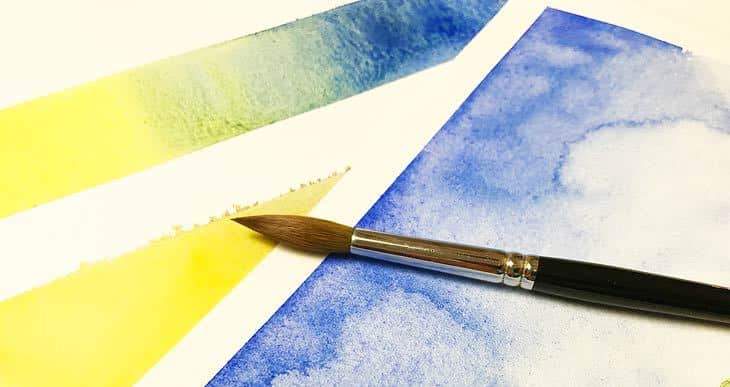
When you brush paint onto damp paper, or an already wet wash, the color on your brush merges smoothly together on the surface. Painting shapes with this technique is known as “wet on wet” and it produces beautiful diffused colors.
If you then let that colored shape dry, then paint another shape which overlaps the first form, the combination of the two layers of paint produces a richer, darker result. This is possible because of the transparent nature of watercolors. Painting by building up layers in this way is known as glazing.
Step 1
Sketch some leaves onto watercolor paper. You can use your own leaves if you want, or simply download and transfer my sketch template (download here…)

Step 2
Begin by painting the leaf shapes with a juicy wet wash of yellow. The paint can be light and diluted at this stage. We’ll build up more intense colors by glazing later.
Step 3
While the yellow paint is still wet, drop in some orange color and let the paint diffuse.
Step 4
When you’ve finished charging color into your leaf shape, use the tip of a brush handle to score lines into the damp wash (yep… you need to hold your brush the wrong way around). Draw the veins of your leaves using the sharp tip.
Why this works… By scoring the paper, you create an indent in the surface. The colored pigments from the paint settle into these grooves and produce the vein appearance of the leaves.
Step 5
Let the paint dry before going on to the next stage (use a hairdryer if you want to speed things up). Re-wet the leaf shape using a clean brush and clear water, but this time don’t wet the leaf right up to the edges. Leave a dry gap as if you were painting a smaller leaf inside the first one.

Step 6
Load your brush with yellow, then orange paint and dab color into the wet shape.
Notice as the colors diffuse into the clear water, they stop at the limit of the wet patch, forming a fairly crisp edge. This is one of the characteristics of watercolors – paint will only flow within a shape which is damp.
Step 7
Let the paint dry and move on to the other leaves, painting with the same wet on wet technique as the first leaf. Don’t forget to score the leaf veins while the wash isstill damp.
Observe what happens as the second layer of paint dries on the first leaf. The intensity of the colors increases where you painted the second layer of color. This is the effect of glazing.
Step 8
I repeated this process a third time to add another layer of intensity to the center of the leaves, this time using a Quinacridone Coral color. The wet patch I painted was even smaller in order to create another layer of glazing. The overall effect was to create leaves with light toned edges which become more vivid toward the center.
You can use these techniques to paint any kind of leaf composition. I think this is a fun way to make attractive fall leaf watercolors.
That being said, the resulting leaves are pretty “two-dimensional”. The colors and textures are wonderful, but the composition lacks realism. So in the next demonstration I’ll show you how I used the same painting techniques above to paint a more realistic looking autumn leaf. By adding shade and shadows, and by paying attention to tonal values, you can paint leaves with a more “three-dimensional” appearance.
Realistic Fall Watercolor Leaf Step by Step

Try this painting for yourself ! Click the button below to download the worksheet for this painting.
To help make this watercolor a more realistic looking interpretation, I used the following reference photo as a basis (I’ve included this in the download above). For best results, it’s important to observe your reference and try to identify the shapes of lightness and darkness.

In this photo you can see that certain parts of the leaf are turned towards the light making them light in value, and other parts are turned away from the light source, making them dark in value. Certain parts of the leaf even have cast shadows on them.
If you remember, values, or tones, are used by artists to refer to the relative lightness or darkness of an object. When you can successfully depict values, you have a better chance of producing a convincing looking painting.

Step 1
Sketch the leaf onto watercolor paper, then begin painting the shape with a wet yellow wash, just the same way as in the first exercise.
Remember the zones we identified as being light toned?
I left these areas white, or with a paler wash of yellow. The three main veins of the leaf in the reference photo are also very light valued, so I took care not to paint these, leaving them as a white highlight.
Step 2
While the first wash is still wet, start adding in some orange paint. Remember to reserve the lighter toned areas.
If you make a mistake and put down too much paint you can lift out the color by soaking up the excess paint using a slightly damp brush.
Step 3
Refer to the reference photo and try to discern the patches of dark values, stains and blotches. I dabbed in some Burnt Sienna color to intensify these dark shapes.
Step 4
At this stage, while the wash is still damp, I used the sharp end of my brush handle to mark the secondary veins into the paper.
Step 5
Notice I’m using the same techniques as for the previous painting, only this time I’m paying attention to the areas of light and dark.
Let the paint dry, then re-wet the areas you think need intensifying (you’re applying a glazing technique to increase the values of certain shapes on the leaf).

Step 6
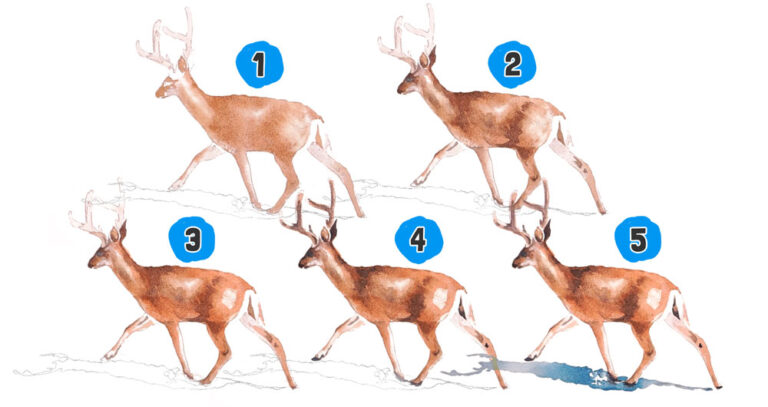
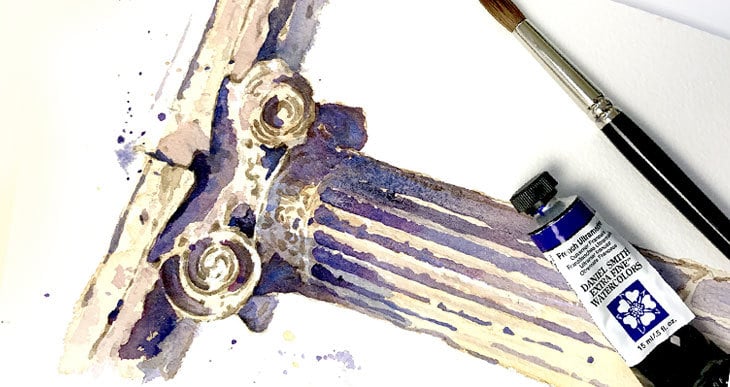
Start painting the shadows. I’m using a mix of Prussian Blue and Burnt Umber to make shadows with a bluish tint (in outdoor situations, shadows appear blue in color, because objects block the yellow light from the sun. but the shadows facing upward take on the blue color of the sky).
Step 7
In general, the closer the shadow is to the object, the darker it becomes. Also, the shadows close to an object take on some of the color from that object because of reflected light.
For this reason I intensified the shadows near the edge of the leaf using a warmer brown color by dabbing some burnt umber into the wet shadow shape.
By treating your shadows in this way you tend to get more realistic results.
Step 8
Leave the leaf painting to dry completely before the next stage.
Step 9
When you examine the reference photo you can see some small cast shadows in a few places on the leaf itself. I added cast shadows to the leaf using a wet on dry technique
This simply means that I painted directly onto the dry painting without wetting the surface first – this tends to produce shapes with crisp edges. I’m also using a blue hue for these cast shadows. This is because the leaf itself is a warm orange color. And with watercolors, the best way to tone down and reduce the saturation of any color is to paint over it using a color on the opposite side of the color wheel (in this case, the opposite of orange is blue).
Step 10
As a final touch, add some texture to your autumn leaf by splashing some drops of brown paint onto the leaf form (I used pieces of roughly torn tissue paper to mask the surrounding whit background).
Lo and behold, you just painted a realistic autumn watercolor leaf…
Well done you!


Anthony you rock.
Nuff said.
Thank you so very very much.
Hi Jill
Thanks very much 🙂
Your scoring technique was magical!!
Yes it’s a handy trick for other painting situations too !
I love your work and tutorial and I am going to try it in the Czech Republic. Helena Svedova
Enjoy your watercolors Helen!
Thank you for sharing your tips in this blog. There are a LOT of watercolor for beginner videos out there, but this step-by-step method allows me to really absorb what you’re teaching without hitting *pause* every few minutes!
You’re appreciated
Good to know Nathalie ! Enjoy your painting !
Wow just what I’ve been looking for. Thank you so much for sharing. What a gift you have . Diane
Thanks Diane !
Great tips! So excited to get started. Honestly was scared to even try till I found this!
Have fun Penny!
Very well designed, comprehensive website especially for a little experienced 95 year old.
Happy to help Will!
Fabulous teaching and tips for aspiring watercolourists . Hi from Vancouver, Canada!
Do you have any videos? Would love to watch as you paint 😉
Hi Vicki ! No videos yet but maybe I’ll give it a try…
So glad I found this. Thank you so much.
Very enjoyable and particularly appreciated the clear instructions with combination of pictures and step by step verbage.
Anthony,
You are an amazing teacher. Just reading your material is drawing me more to an art I just got into in my retirement. Thank you !!
Suhas
Enjoy your watercolor painting Suhas !
Anthony, who are you? I really like this website, but it’s kinda strange not to know who you are as an artist! Where can we see your work?
Hi Susan
You can read more about me here
https://www.watercoloraffair.com/about-me/
Amazing!!! Can’t wait to try this
Glad you like it Tina!